公開日:2019年10月25日
更新日:2019年11月15日
目次
- 画面要素の位置調整
1.1. 水平方向中央に表示
1.2. 垂直方向中央に表示
1.3. 画面中央に表示 - 画面要素を横に並べる(応用)
- 画面要素を縦に並べる(応用)
LinearLayoutの使用方法を3回に分けて説明します。1回目は「画面要素を横に並べる方法」、2回目は「画面要素を縦に並べる方法」、3回目は「応用」です。
このブログではLinearLayoutの「応用」について紹介します。
1. 画面要素の位置調整
この章では画面の水平方向中央、垂直方向中央、画面中央に要素を表示する方法について説明します。
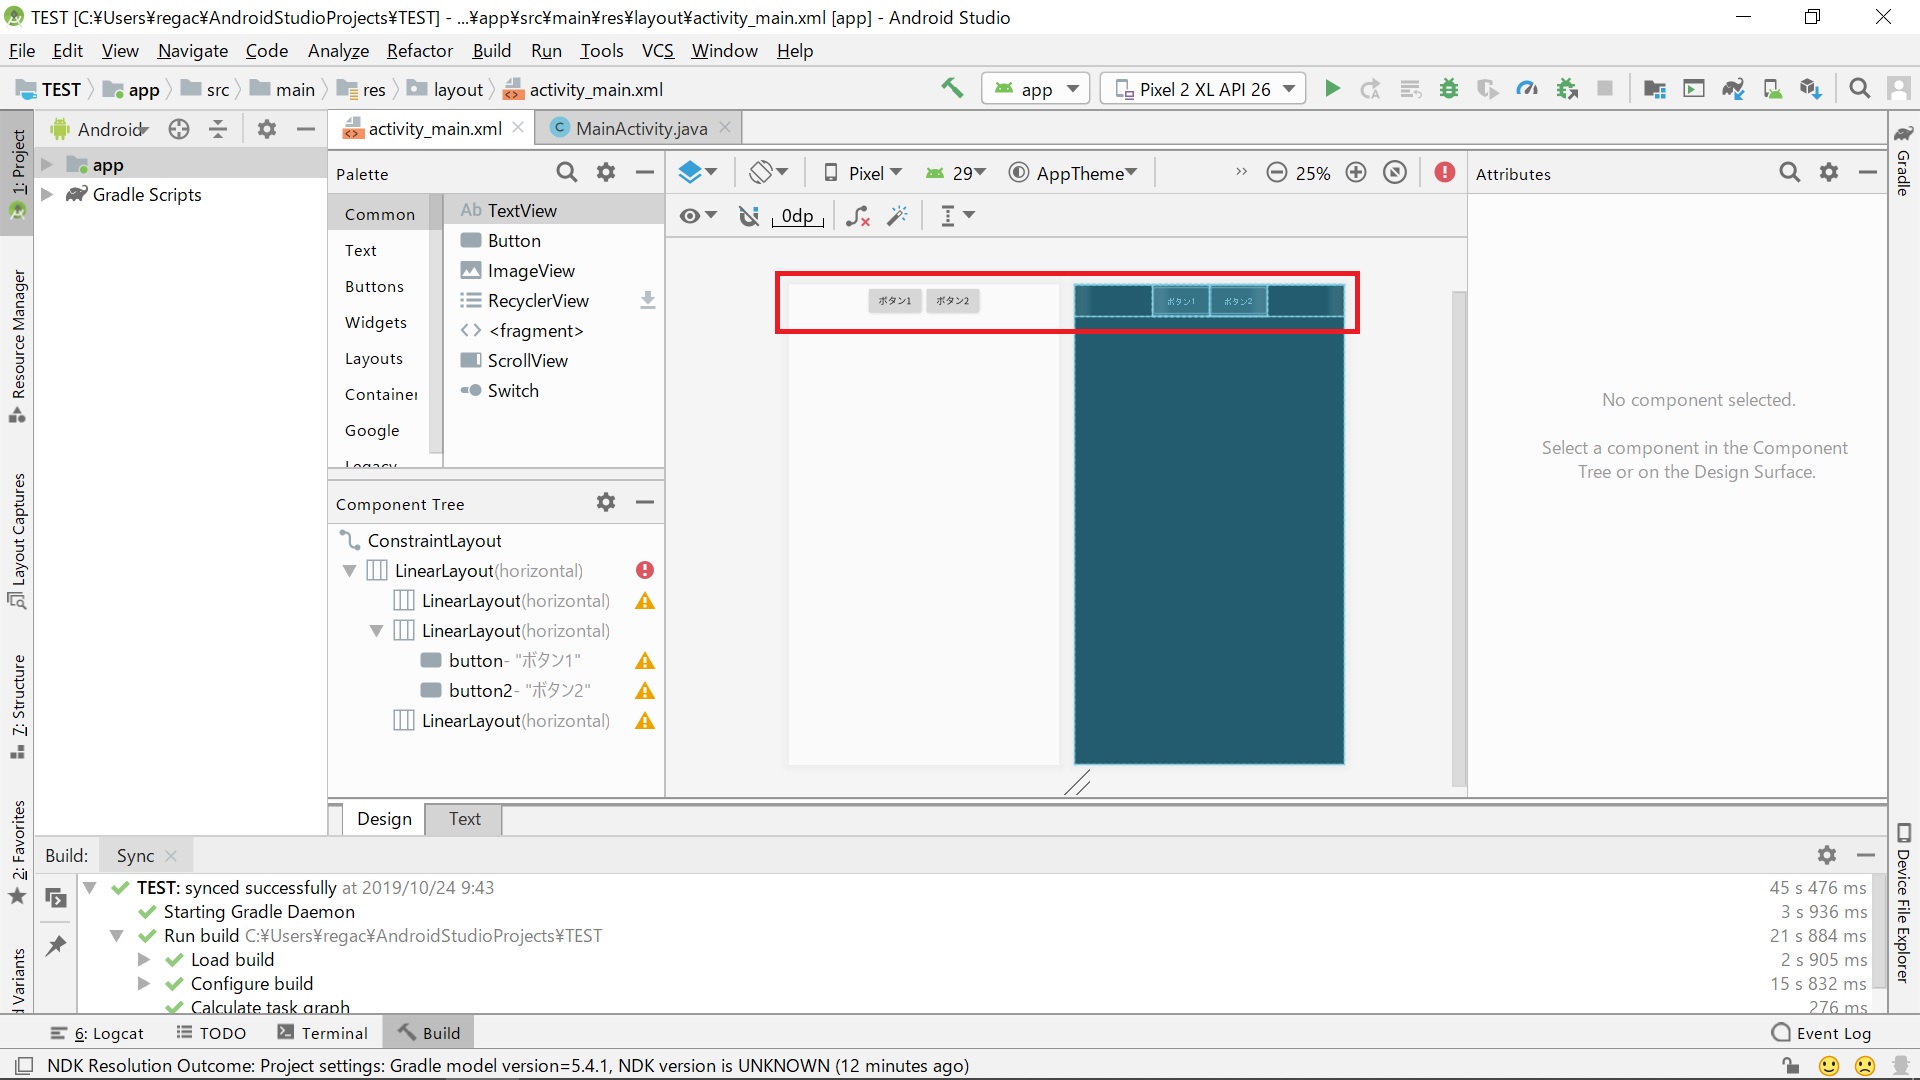
1.1. 水平方向中央に表示
下図のように水平方向中央に並ぶ2つのボタン(ボタン1、ボタン2)の表示法について説明します。
上図のコードは下記のようになります。※下記は一例です。
<LinearLayout
    android:orientation="horizontal"
    android:weightSum="10"
    android:layout_width="match_parent"
    android:layout_height="wrap_content">

    <LinearLayout
        android:orientation="horizontal"
        android:layout_weight="5"
        android:layout_width="wrap_content"
        android:layout_height="wrap_content">
    </LinearLayout>

    <LinearLayout
        android:orientation="horizontal"
        android:layout_width="wrap_content"
        android:layout_height="wrap_content">
        <Button
            android:id="@+id/button"
            android:layout_width="wrap_content"
            android:layout_height="wrap_content"
            android:text="ボタン1"
            tools:layout_editor_absoluteX="54dp"
            tools:layout_editor_absoluteY="95dp" />

        <Button
            android:id="@+id/button2"
            android:layout_width="wrap_content"
            android:layout_height="wrap_content"
            android:text="ボタン2"
            tools:layout_editor_absoluteX="213dp"
            tools:layout_editor_absoluteY="104dp" />
    </LinearLayout>

    <LinearLayout
        android:orientation="horizontal"
        android:layout_weight="5"
        android:layout_width="wrap_content"
        android:layout_height="wrap_content">
    </LinearLayout>

</LinearLayout>
LinearLayoutを入れ子にし、「weightSum」と「layout_weight」を使用してボタン要素の位置調整を行っています。下記で「weightSum」と「layout_weight」の簡単な説明を行います。
「weightSum」では表示割合の最大値を、「layout_weight」では表示割合の合計が最大値になるように設定します。
例えば、ボタン1とボタン2を1:1の割合で水平方向に表示させる場合、「weightSum」を10に設定すると、ボタン1の「layout_weight」を5に、ボタン2の「layout_weight」を5に設定する必要があります。
「weightSum」の構文は下記のようになります。
android:weightSum="10"
ここからはコードの中身について簡潔に説明します。
上位の「LinearLayout」で「weightSum」の値を設定します。
<LinearLayout
    android:orientation="horizontal"
    android:weightSum="10"
    android:layout_width="match_parent"
    android:layout_height="wrap_content">

  ・
  ・
  画面要素
  ・
  ・

</LinearLayout>
上位の「LinearLayout」の中には3つの「LinearLayout」が配置されています(下記参照)。これらは水平方向を分割するためのもので、1つ目と3つ目の「LinearLayout」が位置調整用、2つ目が画面要素の設定用となっており、位置調整用の「LinearLayout」の「layout_weight」の値を任意に変更するだけで、画面要素の位置調整が簡単にできます。
<LinearLayout
    android:orientation="horizontal"
    android:weightSum="10"
    android:layout_width="match_parent"
    android:layout_height="wrap_content">

    <LinearLayout
        android:orientation="horizontal"
        android:layout_weight="5"
        android:layout_width="wrap_content"
        android:layout_height="wrap_content">
    </LinearLayout>

    <LinearLayout
        android:orientation="horizontal"
        android:layout_width="wrap_content"
        android:layout_height="wrap_content">
    ・
    ・
    画面要素
    ・
    ・
    </LinearLayout>

    <LinearLayout
        android:orientation="horizontal"
        android:layout_weight="5"
        android:layout_width="wrap_content"
        android:layout_height="wrap_content">
    </LinearLayout>

</LinearLayout>
画面要素(ボタン1、ボタン2)のコードに関しては以前説明しており、手を加えていないため省きます。
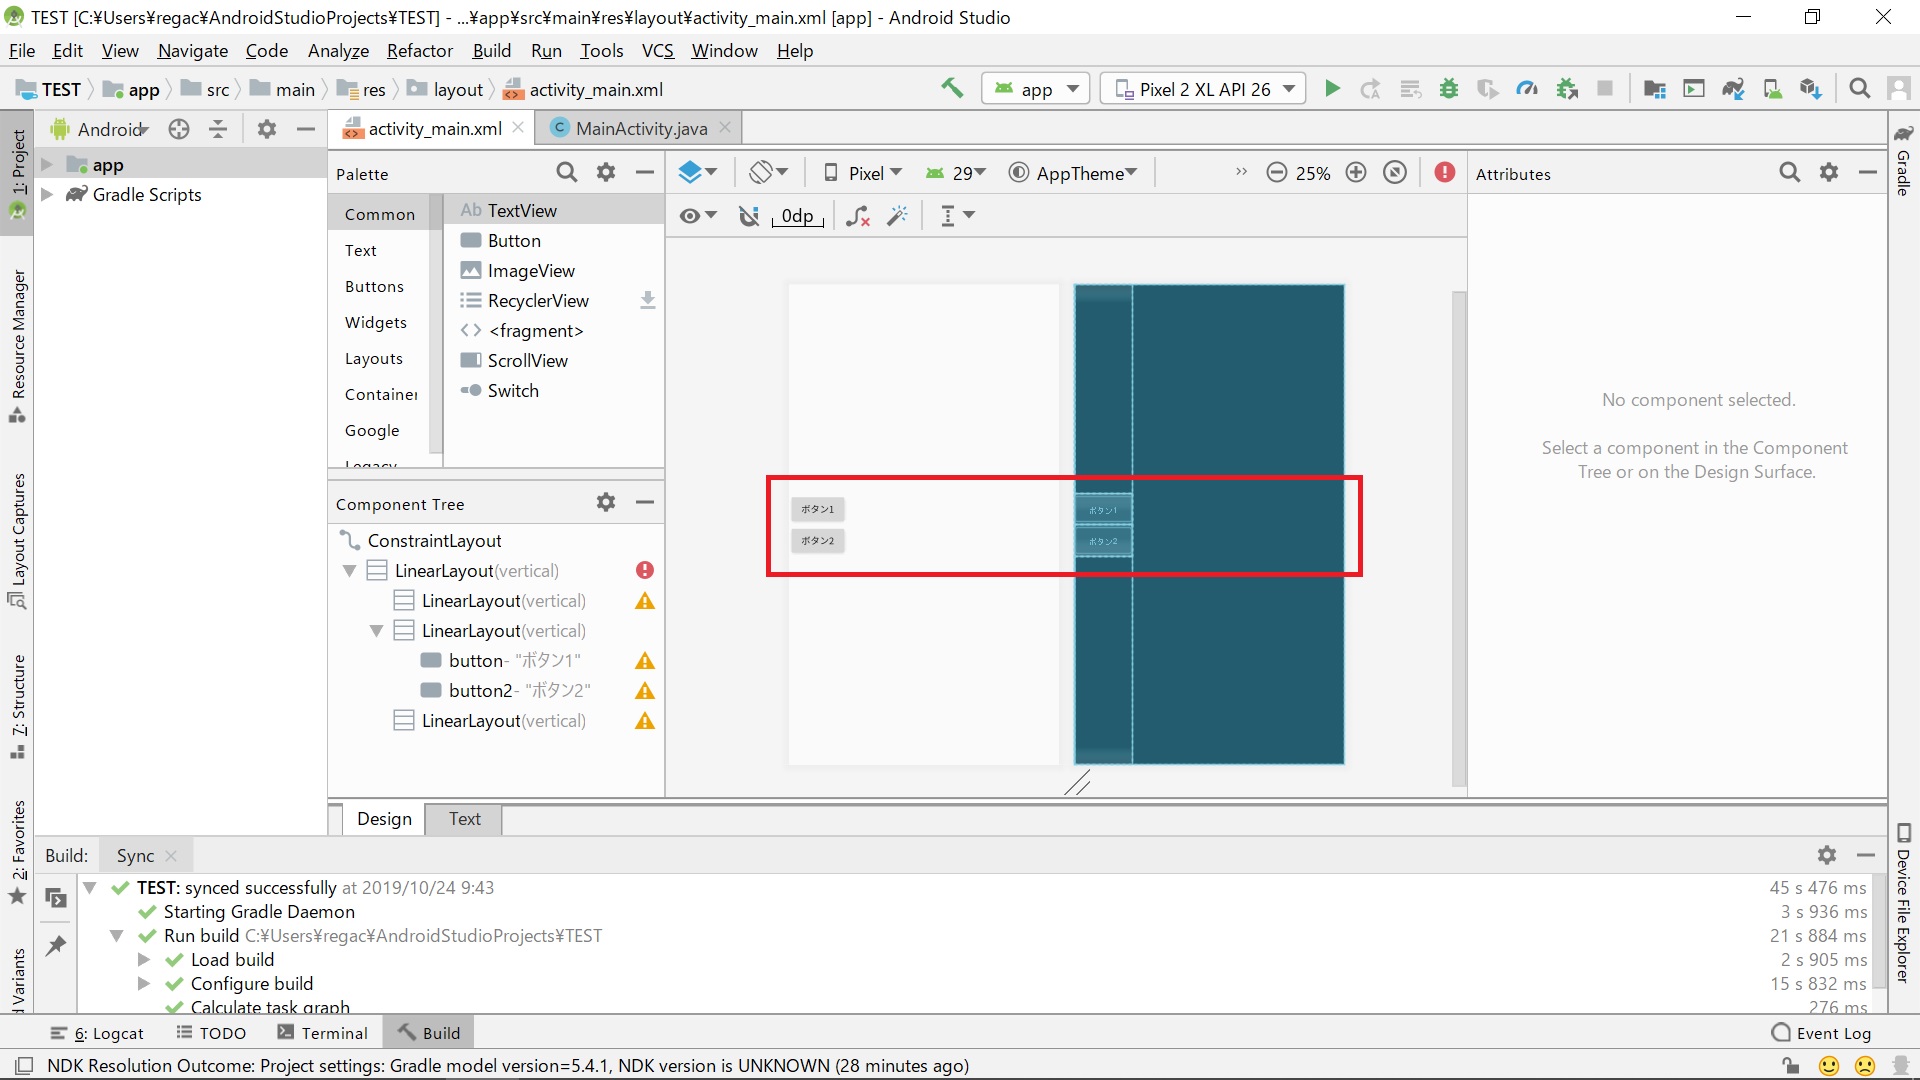
1.2. 垂直方向中央に表示
下図のように垂直方向中央に並ぶ2つのボタン(ボタン1、ボタン2)の表示法について説明します。
コードは下記のようになります。※下記は一例です。
<LinearLayout
    android:orientation="vertical"
    android:weightSum="10"
    android:layout_width="wrap_content"
    android:layout_height="match_parent">

    <LinearLayout
        android:orientation="vertical"
        android:layout_weight="5"
        android:layout_width="wrap_content"
        android:layout_height="wrap_content">
    </LinearLayout>

    <LinearLayout
        android:orientation="vertical"
        android:layout_width="wrap_content"
        android:layout_height="wrap_content">
        <Button
            android:id="@+id/button"
            android:layout_width="wrap_content"
            android:layout_height="wrap_content"
            android:text="ボタン1"
            tools:layout_editor_absoluteX="54dp"
            tools:layout_editor_absoluteY="95dp" />

        <Button
            android:id="@+id/button2"
            android:layout_width="wrap_content"
            android:layout_height="wrap_content"
            android:text="ボタン2"
            tools:layout_editor_absoluteX="213dp"
            tools:layout_editor_absoluteY="104dp" />
    </LinearLayout>

    <LinearLayout
        android:orientation="vertical"
        android:layout_weight="5"
        android:layout_width="wrap_content"
        android:layout_height="wrap_content">
    </LinearLayout>

</LinearLayout>
コードの中身について簡潔に説明します。
上位の「LinearLayout」で「weightSum」の値を設定します。
<LinearLayout
    android:orientation="vertical"
    android:weightSum="10"
    android:layout_width="wrap_content"
    android:layout_height="match_parent">

  ・
  ・
  画面要素
  ・
  ・

</LinearLayout>
上位の「LinearLayout」の中には3つの「LinearLayout」が配置されています(下記参照)。これらは垂直方向を分割するためのもので、1つ目と3つ目の「LinearLayout」が位置調整用、2つ目が画面要素の設定用となっています。詳細は水平方向の場合と同じですので省きます。
<LinearLayout
    android:orientation="vertical"
    android:weightSum="10"
    android:layout_width="wrap_content"
    android:layout_height="match_parent">

    <LinearLayout
        android:orientation="vertical"
        android:layout_weight="5"
        android:layout_width="wrap_content"
        android:layout_height="wrap_content">
    </LinearLayout>

    <LinearLayout
        android:orientation="vertical"
        android:layout_width="wrap_content"
        android:layout_height="wrap_content">
    ・
    ・
    画面要素
    ・
    ・
    </LinearLayout>

    <LinearLayout
        android:orientation="vertical"
        android:layout_weight="5"
        android:layout_width="wrap_content"
        android:layout_height="wrap_content">
    </LinearLayout>

</LinearLayout>
画面要素(ボタン1、ボタン2)のコードに関しては以前説明しており、手を加えていないため省きます。
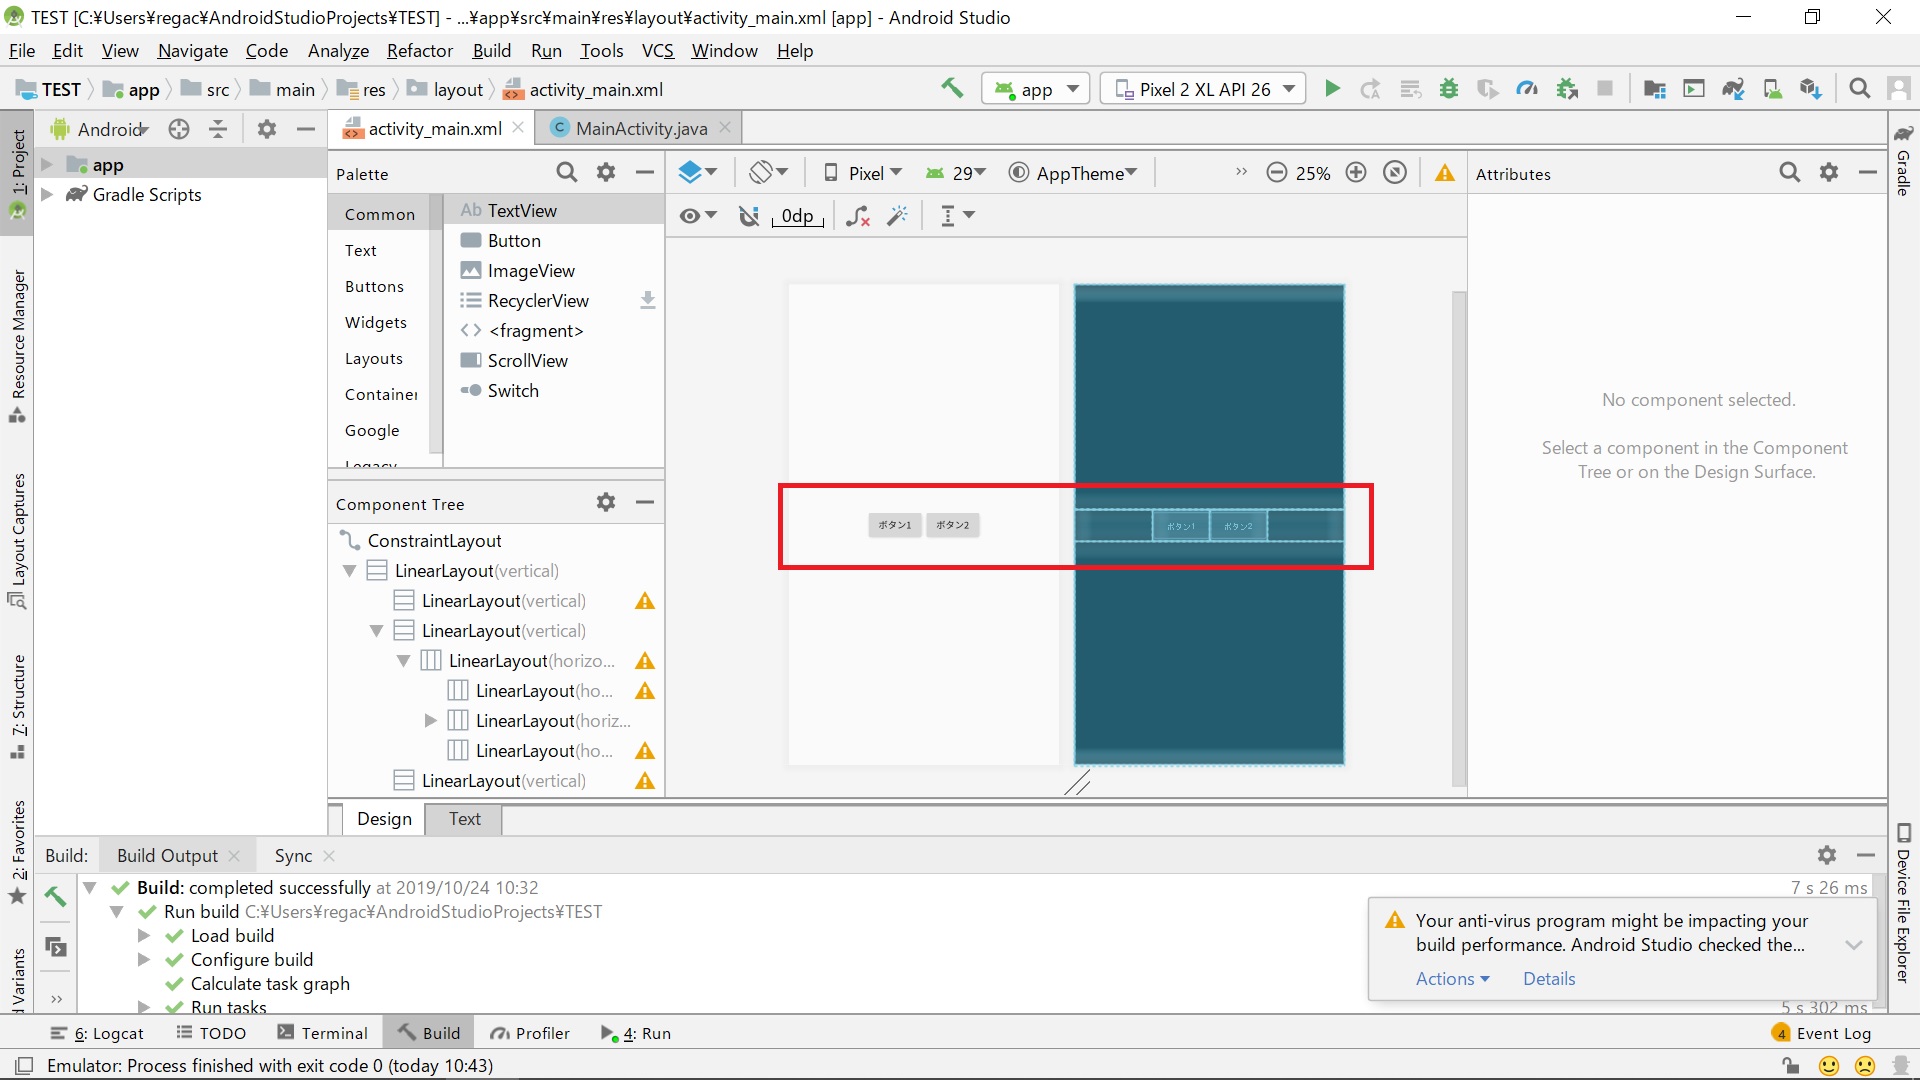
1.3. 画面中央に表示
下図のように画面中央に並ぶ2つのボタン(ボタン1、ボタン2)の表示法について説明します。
コードは下記のようになります。※下記は一例です。
<LinearLayout
    android:orientation="vertical"
    android:weightSum="10"
    android:layout_width="match_parent"
    android:layout_height="match_parent">

    <LinearLayout
        android:orientation="vertical"
        android:layout_weight="5"
        android:layout_width="match_parent"
        android:layout_height="wrap_content">
    </LinearLayout>

    <LinearLayout
        android:orientation="vertical"
        android:layout_width="match_parent"
        android:layout_height="wrap_content">

        <LinearLayout
            android:orientation="horizontal"
            android:weightSum="10"
            android:layout_width="match_parent"
            android:layout_height="wrap_content">

            <LinearLayout
                android:orientation="horizontal"
                android:layout_weight="5"
                android:layout_width="wrap_content"
                android:layout_height="wrap_content">
            </LinearLayout>

            <LinearLayout
                android:orientation="horizontal"
                android:layout_width="wrap_content"
                android:layout_height="wrap_content">
                <Button
                    android:id="@+id/button"
                    android:layout_width="wrap_content"
                    android:layout_height="wrap_content"
                    android:text="ボタン1"
                    tools:layout_editor_absoluteX="54dp"
                    tools:layout_editor_absoluteY="95dp" />
                <Button
                    android:id="@+id/button2"
                    android:layout_width="wrap_content"
                    android:layout_height="wrap_content"
                    android:text="ボタン2"
                    tools:layout_editor_absoluteX="213dp"
                    tools:layout_editor_absoluteY="104dp" />
            </LinearLayout>

         </LinearLayout>

    </LinearLayout>

    <LinearLayout
        android:orientation="vertical"
        android:layout_weight="5"
        android:layout_width="match_parent"
        android:layout_height="wrap_content">
    </LinearLayout>

</LinearLayout>
コードの中身について簡潔に説明します。
画面の垂直方向を3分割するため、下記のように「LinearLayout」の中に3つの「LinearLayout」を配置しています。入れ子の1つ目と3つ目の「LinearLayout」が位置調整用で、2つ目が画面要素の設定用です。
<LinearLayout
    android:orientation="vertical"
    android:weightSum="10"
    android:layout_width="match_parent"
    android:layout_height="match_parent">

    <LinearLayout
        android:orientation="vertical"
        android:layout_weight="5"
        android:layout_width="match_parent"
        android:layout_height="wrap_content">
    </LinearLayout>

    <LinearLayout
        android:orientation="vertical"
        android:layout_width="match_parent"
        android:layout_height="wrap_content">

    ・
    ・
    画面要素
    ・
    ・

    </LinearLayout>

    <LinearLayout
        android:orientation="vertical"
        android:layout_weight="5"
        android:layout_width="match_parent"
        android:layout_height="wrap_content">
    </LinearLayout>

</LinearLayout>
次に入れ子の2つ目の「LinearLayout」の中身について説明します。
画面の水平方向を3分割するため、下記のように「LinearLayout」の中に3つの「LinearLayout」を配置しています。入れ子の1つ目と3つ目の「LinearLayout」が位置調整用で、2つ目が画面要素の設定用です。
<LinearLayout
    android:orientation="horizontal"
    android:weightSum="10"
    android:layout_width="match_parent"
    android:layout_height="wrap_content">

    <LinearLayout
        android:orientation="horizontal"
        android:layout_weight="5"
        android:layout_width="wrap_content"
        android:layout_height="wrap_content">
    </LinearLayout>

    <LinearLayout
        android:orientation="horizontal"
        android:layout_width="wrap_content"
        android:layout_height="wrap_content">
        <Button
            android:id="@+id/button"
            android:layout_width="wrap_content"
            android:layout_height="wrap_content"
            android:text="ボタン1"
            tools:layout_editor_absoluteX="54dp"
            tools:layout_editor_absoluteY="95dp" />
        <Button
            android:id="@+id/button2"
            android:layout_width="wrap_content"
            android:layout_height="wrap_content"
            android:text="ボタン2"
            tools:layout_editor_absoluteX="213dp"
            tools:layout_editor_absoluteY="104dp" />
    </LinearLayout>

    <LinearLayout
        android:orientation="horizontal"
        android:layout_weight="5"
        android:layout_width="wrap_content"
        android:layout_height="wrap_content">
    </LinearLayout>

</LinearLayout>
上記のように「LinearLayout」、「weightSum」、「layout_weight」を組み合わせるだけで、自分の思う通りに自由自在に画面要素を配置することができます。
2. 画面要素を横に並べる(応用)
※随時更新
3. 画面要素を縦に並べる(応用)
※随時更新