公開日:2019年11月5日
更新日:2019年11月15日
目次
このブログではSharedPreferencesの実装法について紹介します。
1. SharedPreferencesとは
アプリ内で使用したデータは基本的にアプリを閉じると消去されますが、今から紹介する「SharedPreferences」を使用すれば、データの再利用、つまり、デバイス内にデータを保存できます。「SharedPreferences」で保存できるデータ型はboolean、int、long、float、Stringで、構造体やクラスは保存対象外です。
2. SharedPreferencesの実装
下図はエディットテキスト、テキストビュー、ボタンの3要素で構成された簡易な画面で、上段左がエディットテキスト、上段右がテキストビュー、下段がボタンとなっています。プログラムの内容を簡単に説明します。ボタンクリック時、エディットテキストに入力された値の合計を算出、その結果をテキストビューに表示、かつ、デバイス内に保存します。
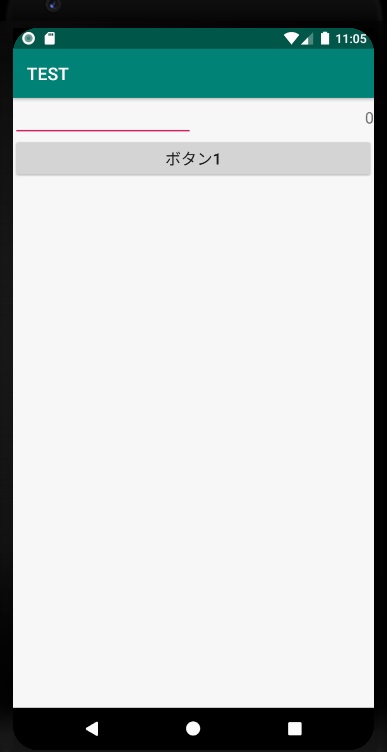
このプログラムをもとに「SharedPreferences」の実装方法について説明します。
~activity_main.xml~
「activity_main.xml」のプログラムは下記のようになります。
<?xml version="1.0" encoding="utf-8"?>
<androidx.constraintlayout.widget.ConstraintLayout xmlns:android="http://schemas.android.com/apk/res/android"
    xmlns:app="http://schemas.android.com/apk/res-auto"
    xmlns:tools="http://schemas.android.com/tools"
    android:layout_width="match_parent"
    android:layout_height="match_parent"
    tools:context=".MainActivity" >

    <LinearLayout
        android:orientation="vertical"
        android:layout_width="match_parent"
        android:layout_height="match_parent">

    <LinearLayout
        android:orientation="horizontal"
        android:layout_width="match_parent"
        android:layout_height="wrap_content">

        <EditText
            android:id="@+id/editText"
            android:layout_width="0dp"
            android:layout_height="wrap_content"
            android:layout_weight="1"
            android:ems="10"
            android:gravity="right"
            android:inputType="numberSigned" />

        <TextView
            android:id="@+id/textView"
            android:layout_width="0dp"
            android:layout_height="wrap_content"
            android:layout_weight="1"
            android:text="TextView"
            android:textSize="18sp"
            android:gravity="right"
            tools:layout_editor_absoluteX="120dp"
            tools:layout_editor_absoluteY="200dp" />

    </LinearLayout>

        <Button
            android:id="@+id/button"
            android:layout_width="match_parent"
            android:layout_height="wrap_content"
            android:onClick="onClickButton"
            android:text="ボタン1"
            android:textSize="18sp"
            tools:layout_editor_absoluteX="54dp"
            tools:layout_editor_absoluteY="95dp" />

    </LinearLayout>

</androidx.constraintlayout.widget.ConstraintLayout>
今回新たに追加したプログラムは下記の通りです。
android:gravity="right"
このプログラムは文字や数値を左、中央、右などに配置します。上記の例では右に文字や数値を配置しますが、左に配置する時は「left」、中央に配置する時は「center」を使用します。他にもオプションがありますので、必要に応じて調べてみてください。
~MainActivity.java~
「MainActivity.java」のプログラムは下記のようになります。
package com.example.test;

import androidx.appcompat.app.AppCompatActivity;

import android.content.Context;
import android.content.SharedPreferences;
import android.os.Bundle;
import android.view.View;
import android.widget.EditText;
import android.widget.TextView;

public class MainActivity extends AppCompatActivity {

    int input_num;  /* 入力値 */
    int total;    /* 入力値の合計 */

    @Override
    protected void onCreate(Bundle savedInstanceState) {
        super.onCreate(savedInstanceState);
        setContentView(R.layout.activity_main);

        /* デバイスから入力の合計値を読み込む */
        SharedPreferences read_total;
        read_total = getSharedPreferences("Test", Context.MODE_PRIVATE);
        total = read_total.getInt("Total",0);

        /* TextViewに入力の合計値を設定 */
        TextView textview;
        textview = (TextView)findViewById(R.id.textView);
        textview.setText(String.valueOf(total));

    }

    /* コンストラクタ */
    public MainActivity() {

        /* 入力値の初期化 */
        input_num = 0;

    }

    /* ボタンクリックイベント */
    public void onClickButton(View v) {

        /* EditTextから入力値を取得 */
        EditText edittext;
        edittext = (EditText)findViewById(R.id.editText);
        input_num = Integer.parseInt(edittext.getText().toString());

        /* 合計値の更新 */
        total = total + input_num;

        /* TextViewに合計値を設定 */
        TextView textview;
        textview = (TextView)findViewById(R.id.textView);
        textview.setText(String.valueOf(total));

        /* 合計値を保存 */
        SharedPreferences write_total;
        SharedPreferences.Editor write_total_editor;
        write_total = getSharedPreferences("Test", Context.MODE_PRIVATE);
        write_total_editor = write_total.edit();
        write_total_editor.putInt("Total",total);
        write_total_editor.apply();

    }
}
中身について簡単に説明します。
onCreate内では、ファイルから入力の合計値を読み込み、合計値をテキストビューに表示します。
@Override
protected void onCreate(Bundle savedInstanceState) {
    super.onCreate(savedInstanceState);
    setContentView(R.layout.activity_main);

    /* ファイルから入力の合計値を読み込む */
    SharedPreferences read_total;
    read_total = getSharedPreferences("Test", Context.MODE_PRIVATE);
    total = read_total.getInt("Total",0);

    /* TextViewに入力の合計値を設定 */
    TextView textview;
    textview = (TextView)findViewById(R.id.textView);
    textview.setText(String.valueOf(total));

}
onCreateの中身について説明します。テキストビューへの表示は前回のブログで説明しましたので割愛させていただきます。
下記のプログラムのように、まずはインスタンスの取得を行いますが、「getSharedPreferences」の第1引数にはデータを保存するためのファイル名を指定し(任意の名前)、第2引数にはファイル操作モードを指定します。ファイル操作モードは下表の通りです。下記のプログラムでは「getSharedPreferences」の第1引数には「Test」、第2引数には「Context.MODE_PRIVATE」が指定されていると思います。
| ファイル操作モード | |
| Context.MODE_PRIVATE | 一つのアプリ内でデータを使用 |
| Context.MODE_MULTI_PROCESS | 複数のアプリ間でデータを使用 |
次にデータの読み込みを行いますが、「read_total.getInt」の第1引数にはファイル内のデータを指定し(任意の名前)、第2引数にはデータがなかった場合の初期値を指定します。下記のプログラムでは「read_total.getInt」の第1引数には「Total」、第2引数には「0」が指定されていると思います。また、データ型ですが、下記の例ではint型の値を読み込んでいますが、「getFloat」や「getString」などfloat型やString型の値も読み込めます。
/* ファイルから入力値の合計を読み込む */
SharedPreferences read_total;
read_total = getSharedPreferences("Test", Context.MODE_PRIVATE);
total = read_total.getInt("Total",0);
ボタンクリックイベントでは、エディットテキストから入力値を読み込み、入力値と過去の合計値をもとに合計値を更新します。そして、その合計値をテキストビューに表示し、デバイス内に保存します。
/* ボタンクリックイベント */
public void onClickButton(View v) {

    /* EditTextから入力値を取得 */
    EditText edittext;
    edittext = (EditText)findViewById(R.id.editText);
    input_num = Integer.parseInt(edittext.getText().toString());

    /* 合計値の更新 */
    total = total + input_num;

    /* TextViewに合計値を設定 */
    TextView textview;
    textview = (TextView)findViewById(R.id.textView);
    textview.setText(String.valueOf(total));

    /* 合計値を保存 */
    SharedPreferences write_total;
    SharedPreferences.Editor write_total_editor;
    write_total = getSharedPreferences("Test", Context.MODE_PRIVATE);
    write_total_editor = write_total.edit();
    write_total_editor.putInt("Total",total);
    write_total_editor.apply();

}
ボタンクリックの中身について説明します。
「findViewById」を使用してエディットテキストから入力値を読み込んでおり、最後の行ではString型からint型への型変換を行っています。
/* EditTextから入力値を取得 */
EditText edittext;
edittext = (EditText)findViewById(R.id.editText);
input_num = Integer.parseInt(edittext.getText().toString());
「getSharedPreferences」は上記で説明しましたので説明を省きます。「write_total_editor.putInt(“Total”,total)」では「Test」ファイル内のデータ「Total」にアプリ内のデータ「total」を保存します。下記の例ではint型の値を書き込んでいますが、「putFloat」や「putString」などfloat型やString型の値も書き込めます。「write_total_editor.apply()」はファイルへの書き込みタイミング(非同期)で、下表のように2種類あります。必要に応じて使い分けてください。
| ファイルへの書き込みタイミング | |
| apply | 非同期 |
| commit | 同期 |
/* 合計値を保存 */
SharedPreferences write_total;
SharedPreferences.Editor write_total_editor;
write_total = getSharedPreferences("Test", Context.MODE_PRIVATE);
write_total_editor = write_total.edit();
write_total_editor.putInt("Total",total);
write_total_editor.apply();
~SharedPreferencesで設定したファイル内を確認するには~
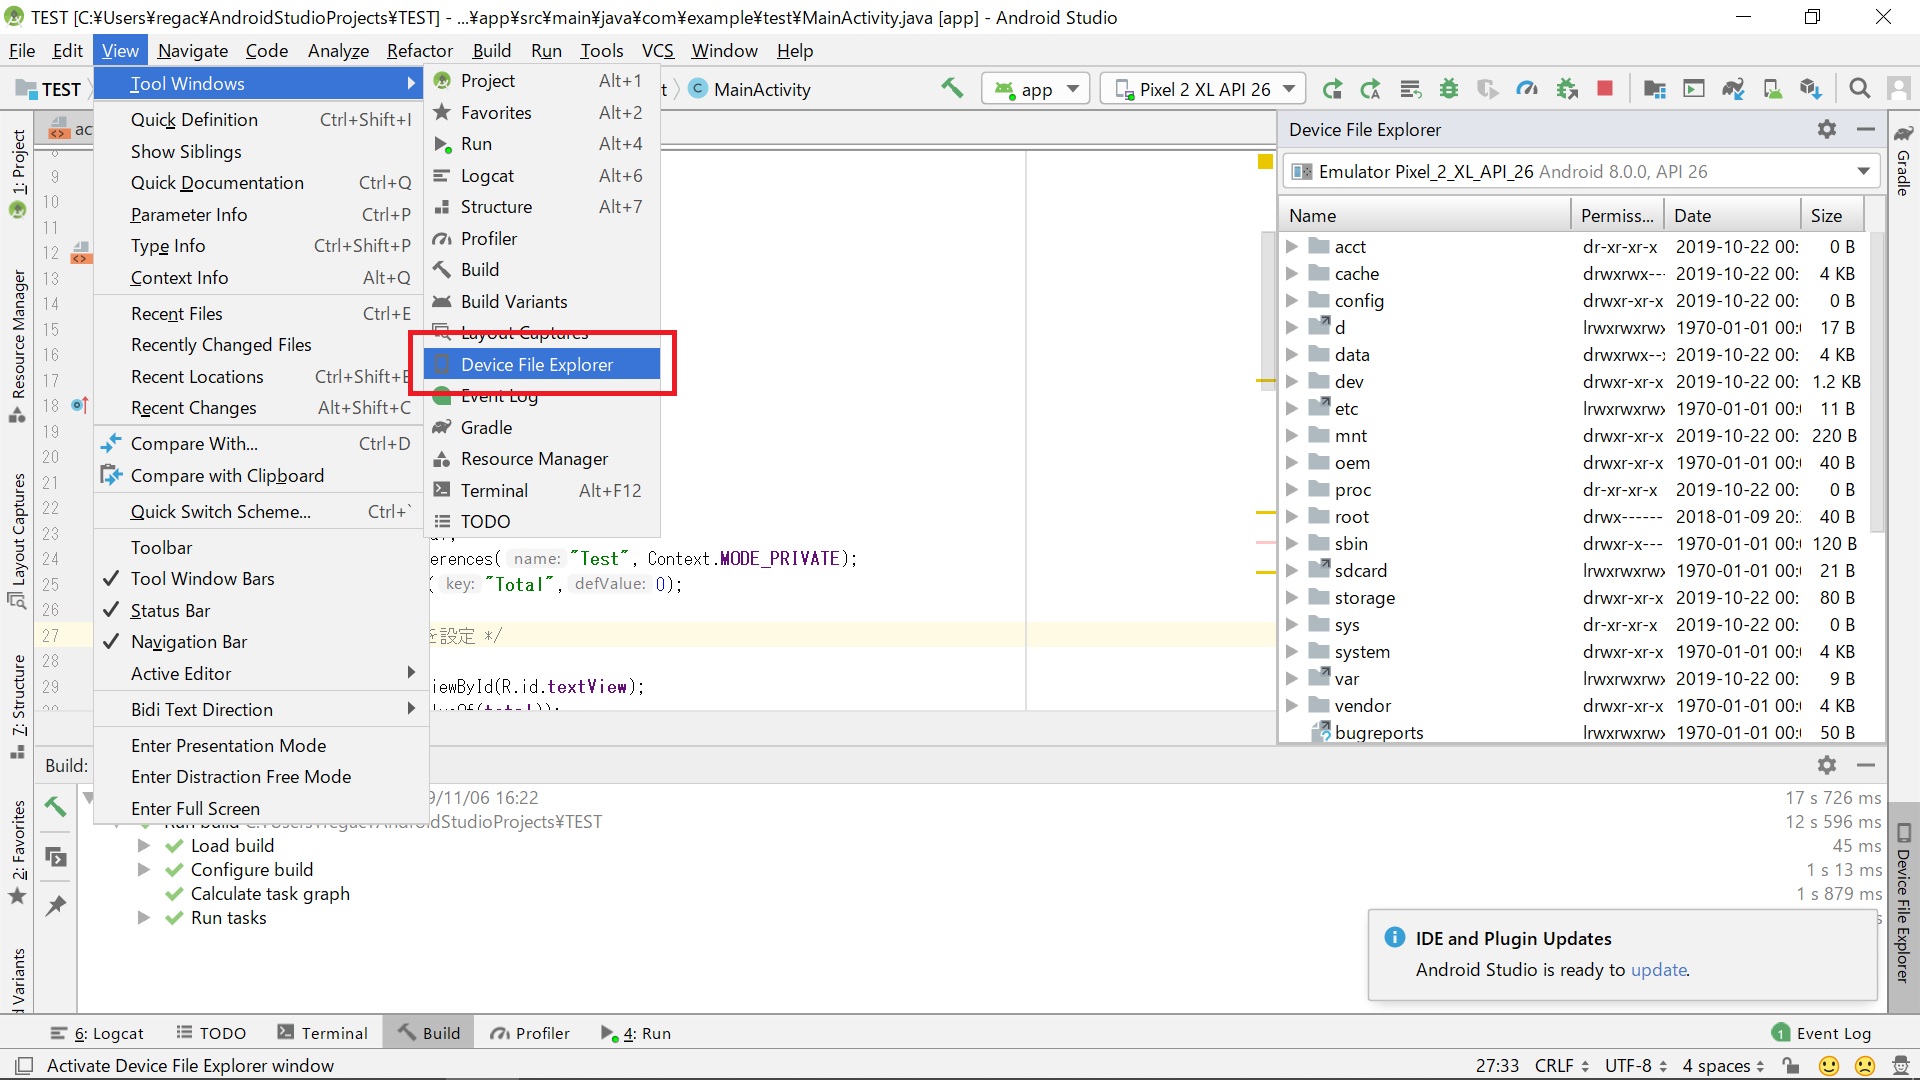
設定したファイル内のデータを確認したい場合、まず、アプリ実行時にView/Tool Windows/Device File Explorerを開きます。
そして、Device File Explorerでdata/data/com.example.プロジェクト名/shared_prefs/設定したファイル.xmlを開きます。
補足ですが、プロジェクト名とはAndroid Studioで作成したプロジェクト名、設定したファイルとはgetSharedPreferencesの第1引数で指定したデータを保存するためのファイル名となります(名前は任意)。
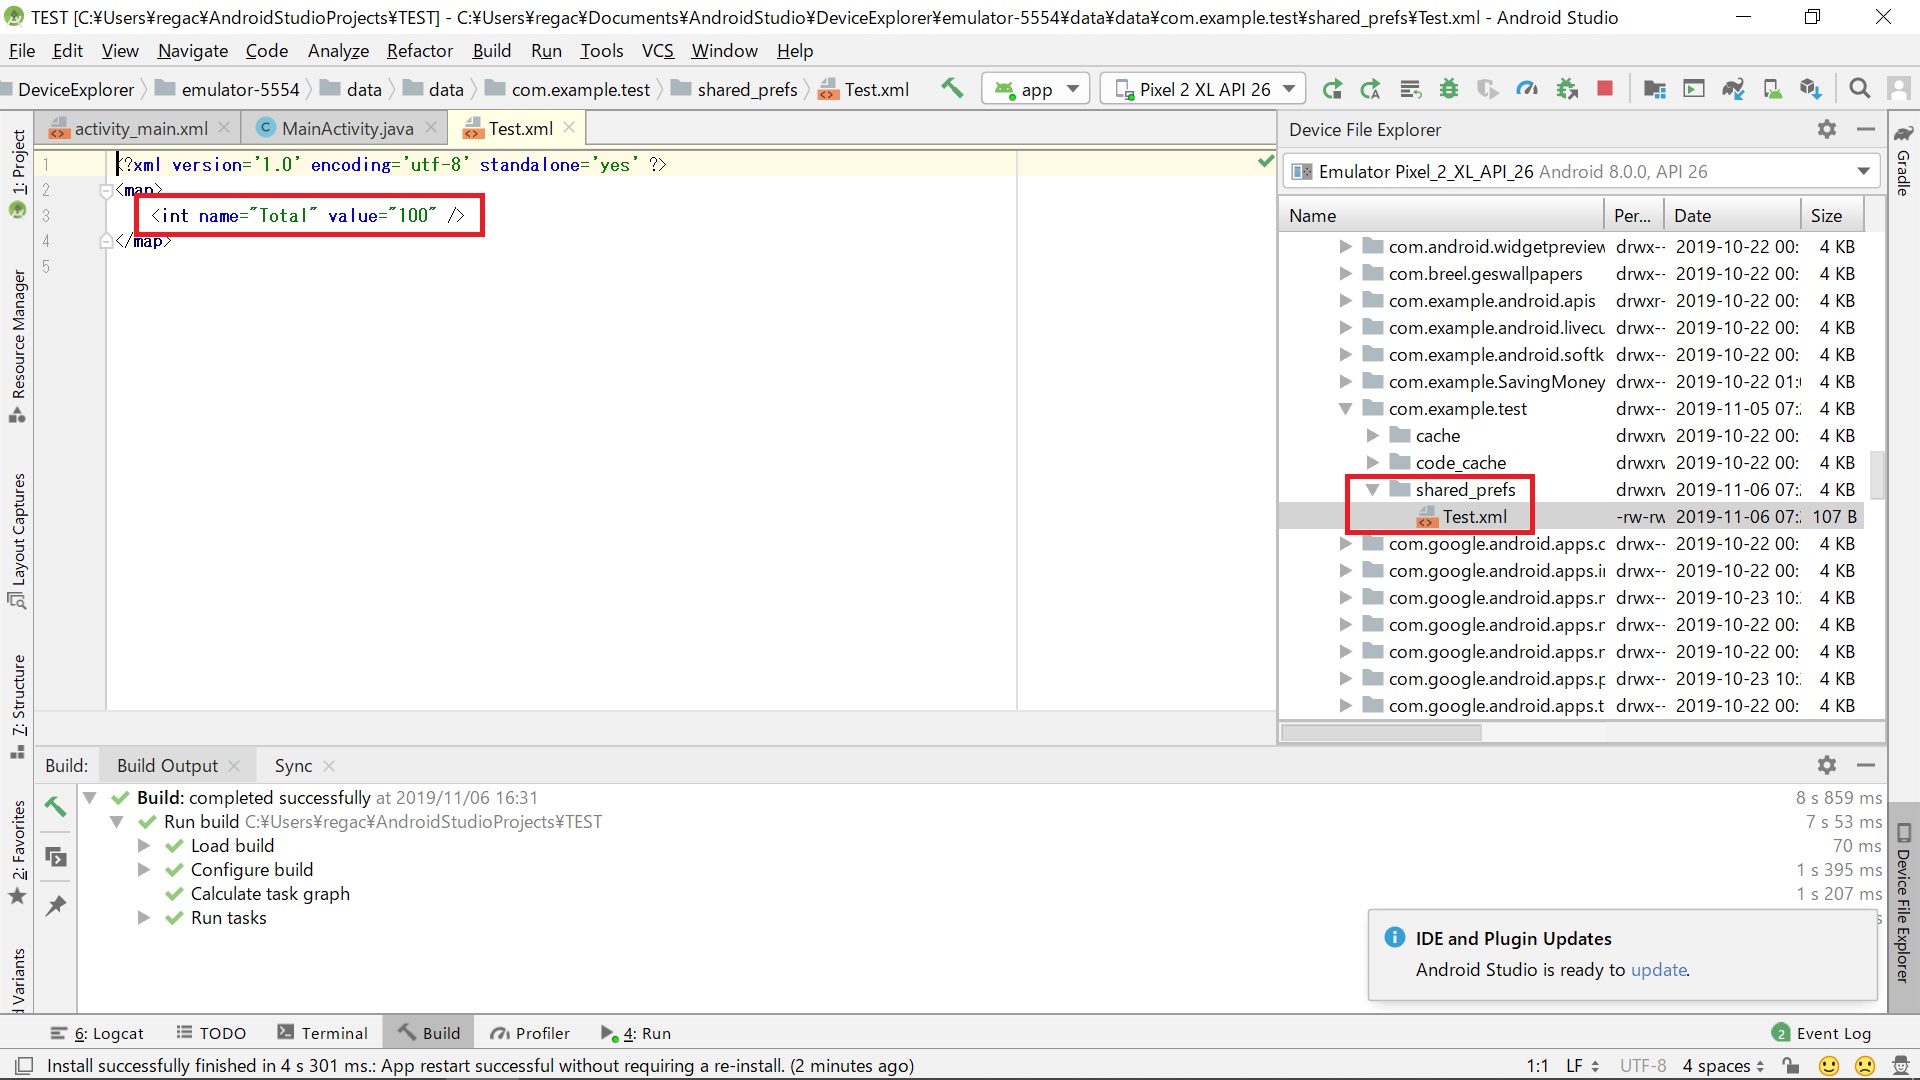
xmlファイルの中身を見ると、int型のデータ「Total」に値「100」が保存されていることが分かると思います。これで確認完了です。
3. まとめ
今回は「SharedPreferences」の実装法について学びました。それらをまとめた内容は下記の通りです。
・SharedPreferences
通常、アプリ内で使用したデータはアプリを閉じると消去されますが、データを次回以降も再利用したい場合、「SharedPreferences」を使用してデバイス内にデータを保存します。保存できるデータ型はboolean、int、long、float、Stringです。
・データの読み書き
デバイスからのデータ読み込みやデバイスへのデータ書き込みは「getSharedPreferences」のインスタンスを取得して行います。その時、下記プログラムの赤字のように、デバイス内のファイル名やファイル内のデータ名は任意に指定でき、下記プログラムの青字のように、1つのアプリ内でデータを使用するか、複数のアプリ間でデータを使用するかの設定も自由にできます。
/* ファイルから入力値の合計を読み込む */
SharedPreferences read_total;
read_total = getSharedPreferences("Test", Context.MODE_PRIVATE);
total = read_total.getInt("Total",0);